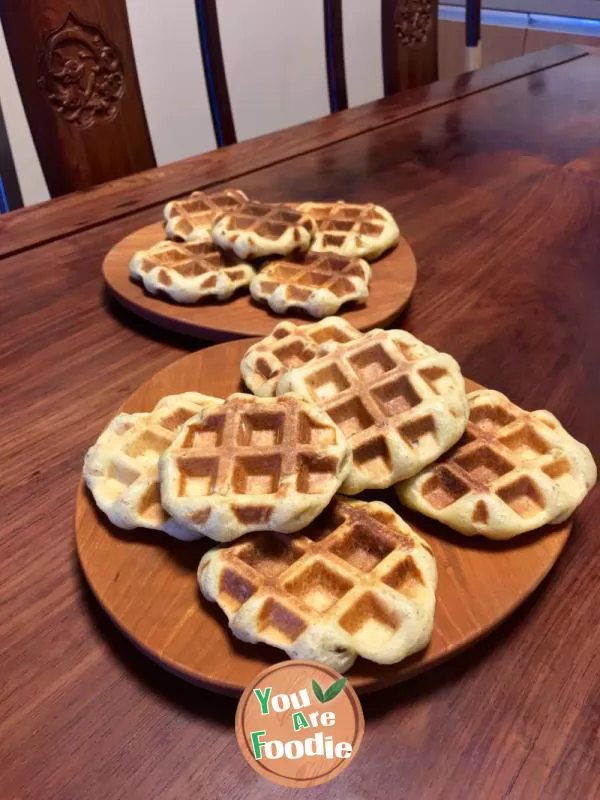

Milk pineapple moon cake
After finishing the lotus moon cake and continuing the fight, I thought of the milk pineapple filling made two days ago. Although I didn't plan to make cantonese moon cakes at first, I might as well use them. Or make 30g mooncakesJianshui is prepared by mixing edible alkaline noodles and water in the ratio of 1:3You don't need to brush too many eggs on the surface. Just brush one layer gently. I'm not used to using silicone brush. This is still a little too much.Baked mooncakes taste better after being greased

Step 1 . Prepare dough materials

Step 2 . Pour the invert syrup into a large bowl and add the water

Step 3 . Stir to make it mixed evenly

Step 4 . Pour in corn oil

Step 5 . Stir to make it mixed evenly

Step 6 . Pour in flour and milk powder

Step 7 . Mix it into a soft and hard dough

Step 8 . Allow to stand for 1 hour

Step 9 . Egg liquid for filling and surface decoration

Step 10 . Cut the pineapple stuffing into small balls of 24 grams each

Step 11 . The dough is divided into 6 grams of small dosage

Step 12 . Take a piece of surface agent and press it flat

Step 13 . Add pineapple stuffing

Step 14 . Push the crust up to cover the filling

Step 15 . Slowly close the mouth and round it

Step 16 . Put a small amount of flour in the moon cake mold, shake it evenly, and then pour it out

Step 17 . Put the wrapped moon cake
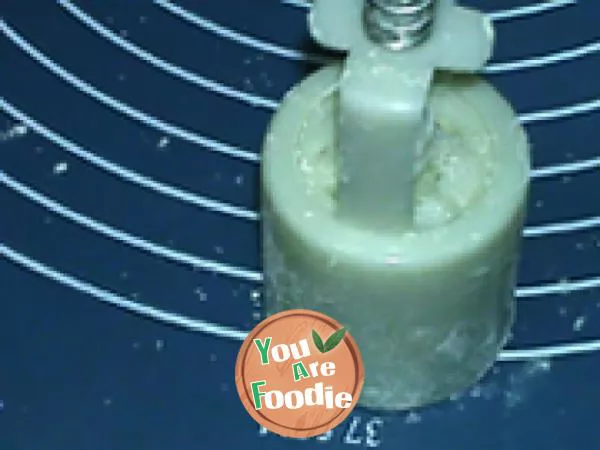
Step 18 . Buckle on the table, press down the handle

Step 19 . Push it out gently,

Step 20 . Drain the prepared mooncakes into the baking pan, spray water on the surface, place them in the oven preheated at 180 degrees, and bake them for about 5 minutes

Step 21 . Take it out, brush the egg liquid on the surface, put it back into the oven, and continue to bake for 15-20 minutes

Step 22 . The surface is golden, and the furnace is discharged
* Information is provided from the Internet, If there is a copyright infringement, Please contact administratoryouarefoodie.com, We will deal with as soon as possible, Thank you!