Framed birthday cake
The child reminded me several times half a month in advance that she was going to have a birthday and asked me to make a birthday cake with many flowers. Although there are many pastry shops, it is safer to make your own cake if you want to use safe and hygienic materials without additives. I just received the Midea steaming oven for evaluation, so I used it to give the children this framed cake. The children liked it very much. They ate more than half of it and the family were very happy.The cake embryo is a 6-inch original pound cake made in Midea steam oven. The mold used is a 6-inch round mold given randomly. The filling is made of canned yellow peaches, the finishing is light cream melted in the mouth, the drenching is white chocolate ganache, and the flowers are Italian cream. Considering that it is for children, the flowers should use the primary color as much as possible, and the whole cake does not have any additives. Here's how to do it:Materials: (a six inch round die can be made)Cake germ: 240g salt free butter, 240g low gluten flour, 100g fine granulated sugar, and 4 eggs.Patterned Italian cream: 300g salt free butter, 38g white granulated sugar (boiled sugar water), 46g water, 120g egg white, 24g fine granulated sugar (beaten egg white).Drench face: 30g white chocolate, 30g light cream.Others: 200g light cream, 15g fine granulated sugar, 2 canned yellow peaches, 1 drop of green food pigment.1. because there are many flowers to decorate this cake, in order to make the cake embryo more supportive, pound cake embryo is selected, which can also be made into sponge cake embryo. Because Midea's steaming oven also has the steaming and baking function, the cake bottom can also be made into Korean rice cake bottom, which can be completed with the pure steaming function;2. the space in the oven is relatively compact, so if you bake bread or cake with high height, you'd better cover the surface with tin paper to avoid too much contact with the heating pipe.3. because the sealing performance of this Midea steaming oven is better than that of the ordinary oven, the heating in the oven is more uniform, and there will be no lack of color on one side of the cake or biscuit, nor will it make the kitchen sultry. It is very practical.

Step 1 . First prepare the ingredients for making the cake embryo. Butter softens at room temperature.

Step 2 . Add fine granulated sugar to the butter, beat until the color turns white and the volume expands, then add eggs one by one, and beat until fully blended.

Step 3 . Sift in the low gluten powder and mix it evenly.

Step 4 . Pour it into the 6-inch round mold and smooth the surface to form a low in the middle and high around.

Step 5 . Select the preheating mode of Midea steaming oven. By default, the upper and lower fires are heated at 170 degrees. After 10 minutes, put the grill and mold into the third layer of the oven. The time is set to 50 minutes, and directly start baking.
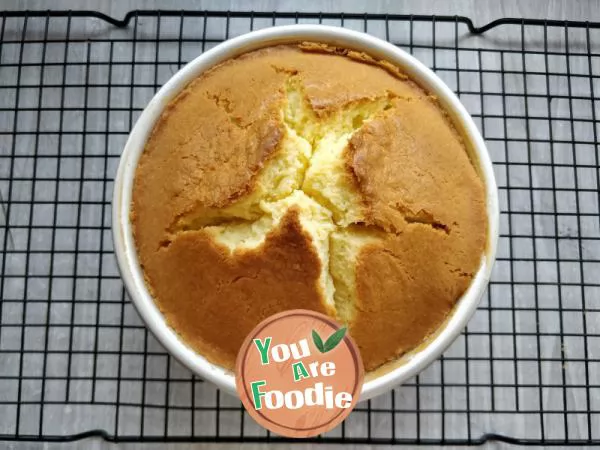
Step 6 . There will be an electronic sound prompt after baking. At this time, take out the whole cake, and you can see that the coloring is uniform, indicating that the heating in the furnace is balanced. The bulging part on the top is the feature of pound cake. It is best to cover the surface with tin foil after baking to avoid over coloring. After demoulding, put it on the drying net to cool. Because it is a heavy oil pound cake embryo, it is easy to demould. When not in use, apply oil powder first, and the mold will not adhere.

Step 7 . Divide the cake embryo into two or three pieces horizontally and put it aside for standby.

Step 8 . At the same time, prepare the ingredients for making cream.

Step 9 . Make cream: beat the butter with an egg beater until smooth and set aside.
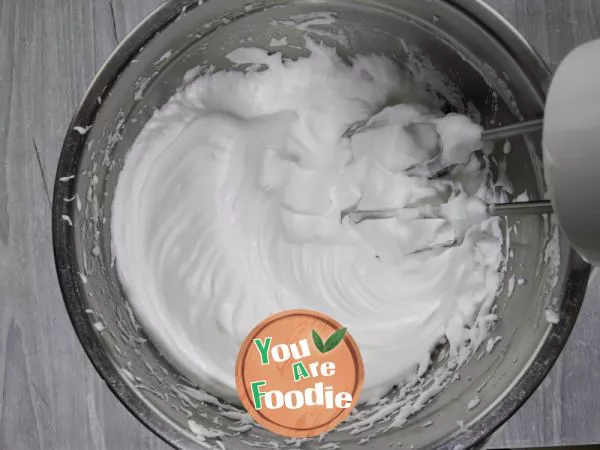
Step 10 . Add fine granulated sugar to the egg white and send it to the state of distribution.

Step 11 . While whisking the egg white, heat the sugar water to 118-121 degrees, pour the sugar water into the egg white along the edge of the basin, quickly whisk it until the paint is shiny, and then pour it into the butter to whisk it until it is shiny and delicate. The cream is ready.

Step 12 . If cream is used for plastering and making interlayer, this step can be omitted. Because children prefer light cream, I use light cream and fine granulated sugar to decorate the cake.

Step 13 . Assemble the cake germ: spread a piece of cake germ with a little whipped light cream (or cream), and sprinkle the sliced canned yellow peach on it.

Step 14 . Add a little light cream (or cream cream) to the yellow peach, smooth another piece of cake germ on the back cover, repeat the filling process, roughly smooth the four sides and the top, and then put it into the refrigerator for cold storage.

Step 15 . Flower mounting: put the cream into the flower mounting bag, install the 104 rose mouth, put the base on the flower mounting nail, and squeeze out the first circle of three petals. (I use primary cream. If you need to color, mix it with oily pigment and put it into a flower mounting bag.)

Step 16 . Then squeeze out the petals of the second and third layers until the whole flower is finished, and put it into the refrigerator for freezing.

Step 17 . Make a gonache: prepare white chocolate and light cream.

Step 18 . Melt the white chocolate into a liquid state in the microwave oven over a low heat, add light cream one by one, and mix well until you lift the scraper to form a continuous thin line.

Step 19 . Rotate and pour Wendy ganash around the top of the cake to form a natural dripping state.
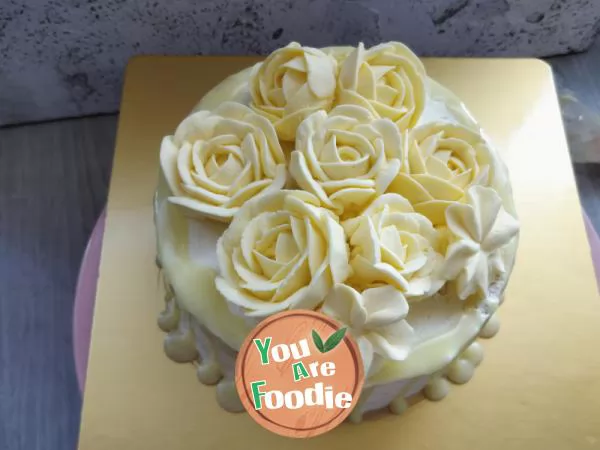
Step 20 . Final assembly: pile the cream higher in the middle of the cake, and put the frozen flowers on the cake.

Step 21 . Add 1 drop of green food pigment to the remaining light cream or cream, mix well, and then squeeze out leaves between the flowers with the flower mouth.
* Information is provided from the Internet, If there is a copyright infringement, Please contact administratoryouarefoodie.com, We will deal with as soon as possible, Thank you!
