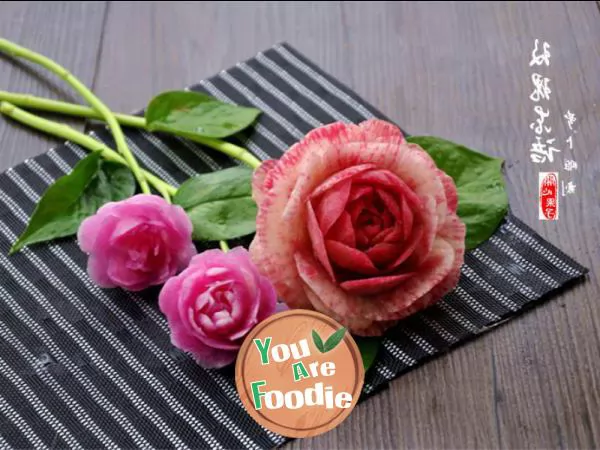
Carve radish flowers to add icing on the cake to your dishes
Have you been amazed? At first glance, I thought it was a real flower? How can you make your delicacies better without learning how to carve them?In addition to busy making all kinds of children's fun meals these days, I also have a strong interest in decorative flowers and radish carving. I've always wanted to have a try with radish flowers. In the past, in the streets and alleys, I often saw stalls selling radishes with beautiful hearts pushing their carts, placing the carved radish flowers in a prominent position to solicit business. Every time I would stand in front of the stall and stare at the radish flowers curiously for a long time. I didn't know where I started. I felt very magical. In spring, the beautiful radishes are sold less. There are cheap red radishes everywhere. I want to buy some red radishes to practice! I didn't have a special carving tool knife. I found an art knife at home. I couldn't wait to carve radish flowers for the first time. I didn't know how to carve. Anyway, I could carve as I wanted. As a result, I was drunk and amazed. It was so good to carve. Not a single radish was damaged. I think it would be more meaningful to share a good method with you. However, the process of taking pictures is still difficult to understand. Some of them really need you to practice and summarize many times before you can understand the skills. My carving method is from the outside to the inside. You can practice slowly to understand the skills according to the method steps.Come on, action is better than heart!1. Remember the cutting rule: don't cut the second circle of petals immediately before cutting a layer of petals. You have to cut off the prominent edges and corners before cutting2. Don't buy radishes that have been stored for a long time. They are foamy with severe water loss3. The position of each petal of each lower layer should be regular, and the included angle between each two petals above. Do not cut each petal too thick. Pay attention to the method of holding the knife during carving and the gradient. The smaller the gradient is, the thinner the skin will be cut
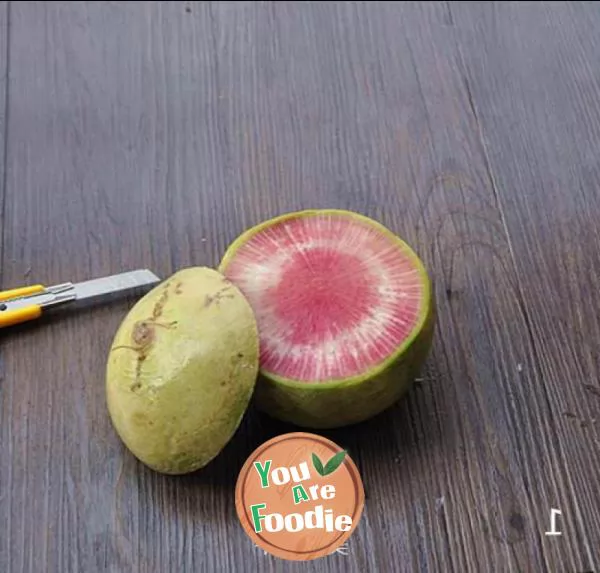
Step 1 . Cut the radish into two pieces from the bottom half, and don't use the tail
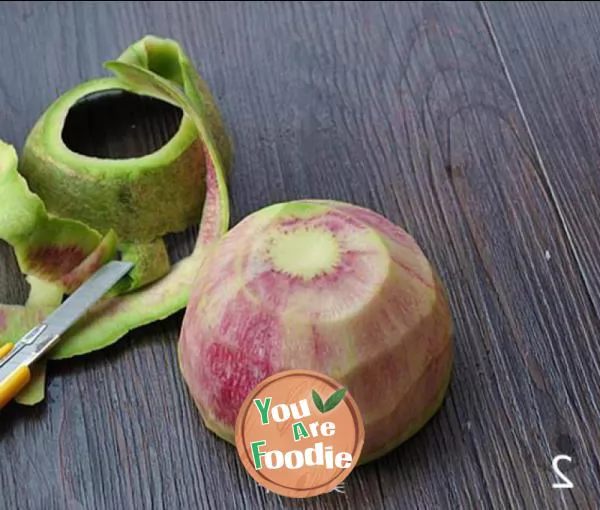
Step 2 . Cut the radish head to remove the corners of the head, which is a bit like a top, but don't cut it too sharp, and leave a small part of the comment, because this end is to be used as the bottom of the radish flower, which is flat and easy to place stably
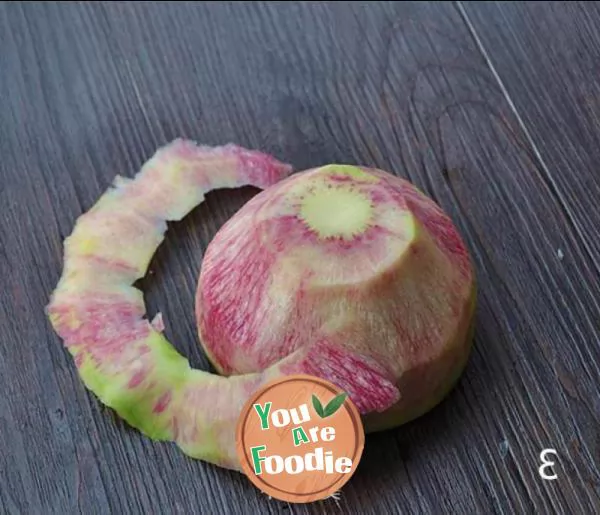
Step 3 . Continue to cut off the edges and corners of the middle belly bulge along the edge
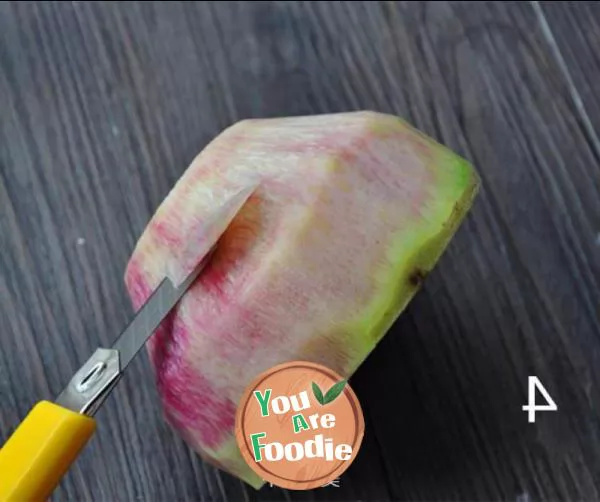
Step 4 . Round the tail
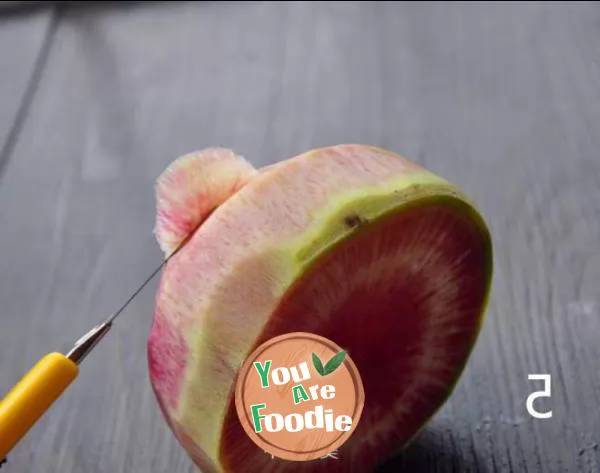
Step 5 . Cut the first petal of the first layer at the beginning. The petals of this layer are actually the bottom of the petals, so each piece should be cut larger. Pay attention to slow cutting to prevent scratching your hand and cutting off the radish flower pieces due to too fast
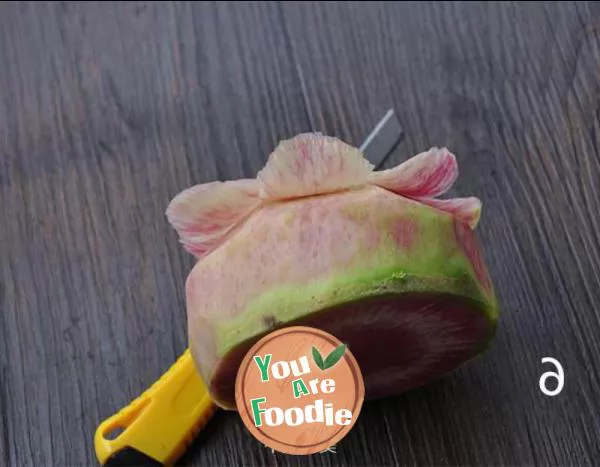
Step 6 . Evenly rotate and cut a circle to form a circle of multiple petals
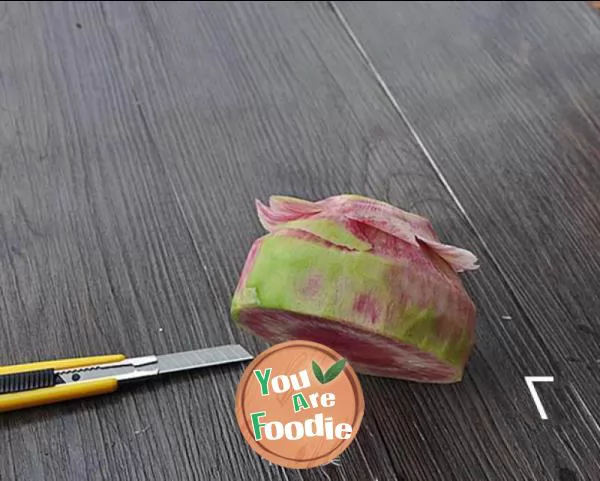
Step 7 . Cut off the bulged triangle formed by cutting at the angle between the two petals in the first circle
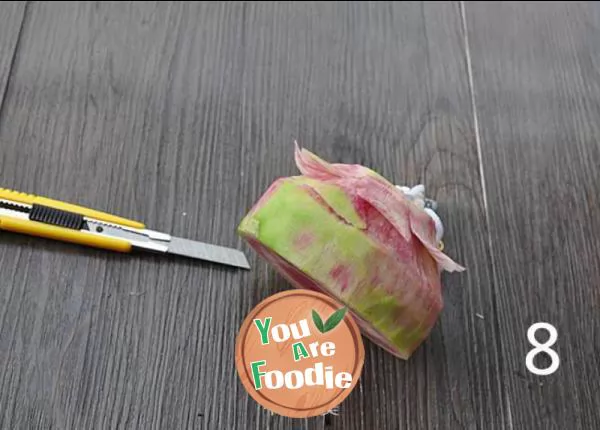
Step 8 . Cut off all corners and excess parts
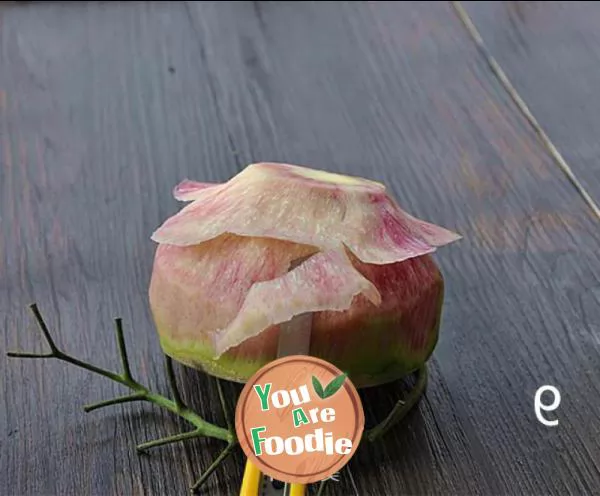
Step 9 . Cut a thin layer of skin along the edge. Don't cut too much and too thick, just make the edge smoother
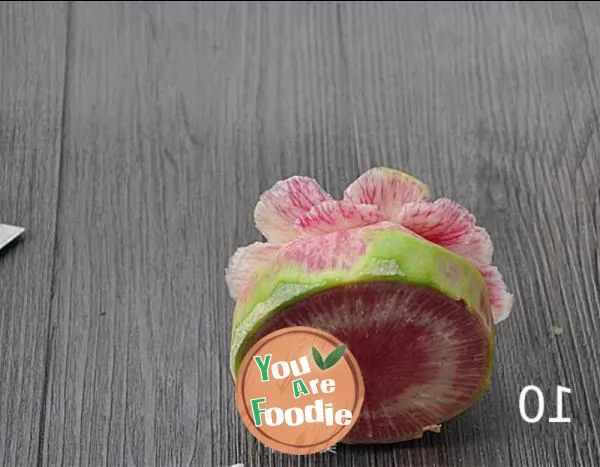
Step 10 . Start cutting the petals of the second layer. The cutting position of each petal of the second layer should be at the angle between each two petals of the first layer,
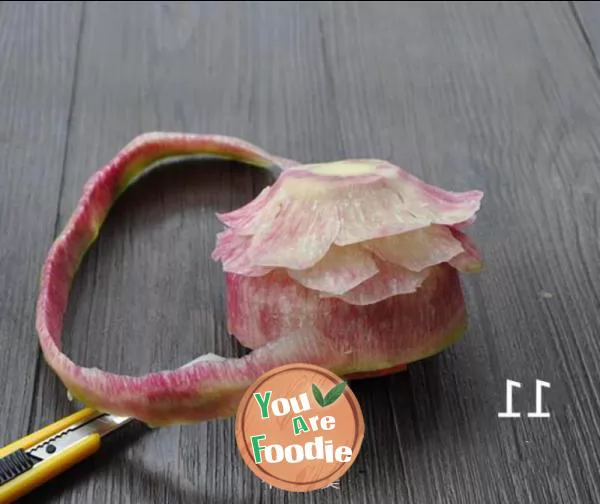
Step 11 . As after cutting the petals in the first circle, cut off the bulged triangle between each two petals in the same way, and then rotate to cut off a thin circle of skin
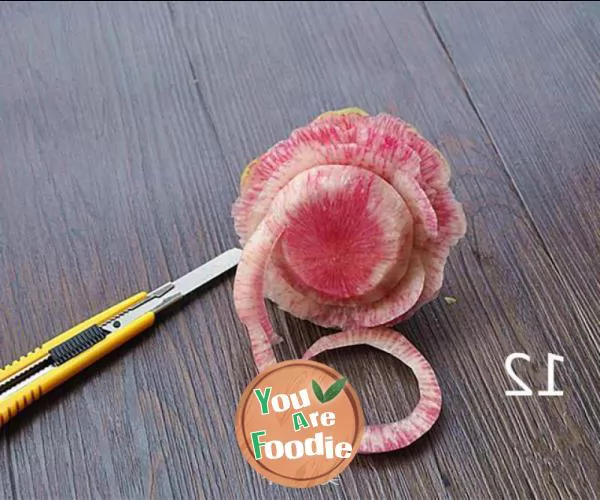
Step 12 . In this way, every time you rotate and carve a circle of petals, you can cut off the redundant edges and corners to form a smooth round edge to carve beautiful petals. Each petal should not be cut too thick, which is easy to break, and each circle of petals is smaller and shorter than that of the circle
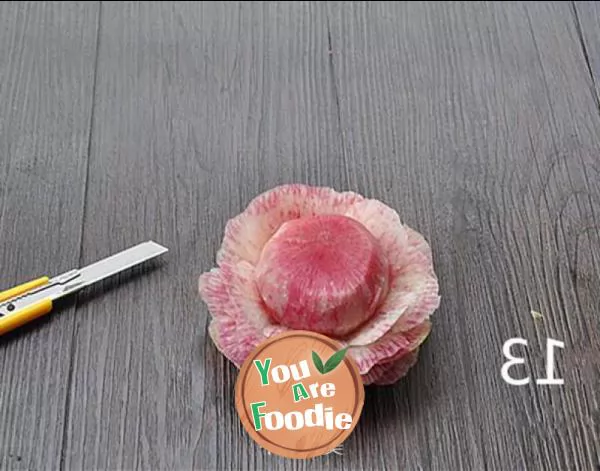
Step 13 . Go to the heart of the radish and cut off the prominent edges and corners again, as shown in the figure
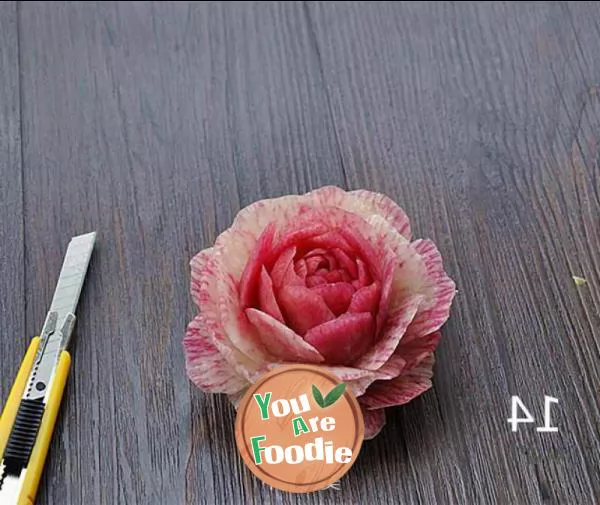
Step 14 . In this way, continue to cut the petals in circles until the heart is cut, and a beautiful petal is made
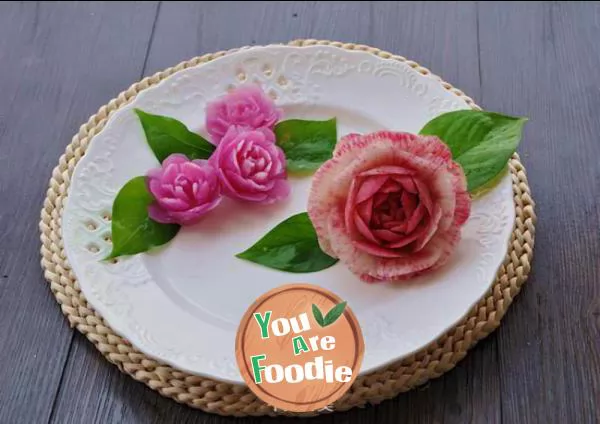
Step 15 . Match the cut radish flowers with green leaves to make your favorite decoration,
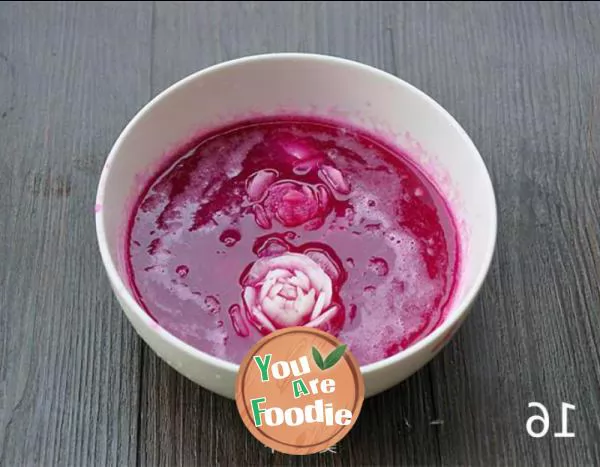
Step 16 . If it is a white radish or a red skin and white meat radish carving, you can put it in the water with purple cabbage juice and soak it in a few drops of white vinegar for twoorthree hours after carving. The color will be more beautiful and charming. If it's not urgent, you can soak the carved radish flowers in a bowl with water to maintain a beautiful flower face. Take it out when you need it. The shorter the soaking time, the lighter the color of the flowers, but don't soak for twoorthree days when it's hot, otherwise, you know.
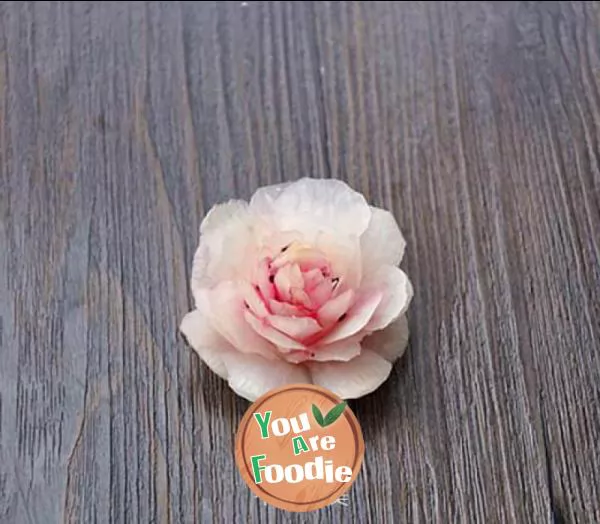
Step 17 . This is a flower with a short soaking time. Its color is light, and it has a unique charm. Practice carving in kind for several times. If you find skills, you can skillfully carve beautiful radish flowers. Let's have a try!
* Information is provided from the Internet, If there is a copyright infringement, Please contact administratoryouarefoodie.com, We will deal with as soon as possible, Thank you!
