
Pork rolls with green pepper
The method is simple, the materials are easy to obtain, the appearance is scorched and crisp, and the inside tastes soft and delicious~~~Because I don't like fat meat, I use refined meat as filling, and the filling with streaky pork will be more fragrant! Flour is the flour used to steam steamed buns at home. The vegetables in the stuffing can be replaced with other ones as you like. The temperature of ovens of different brands varies. Please adjust it appropriately according to your own oven. This portion is made of 4. The outside is crispy and the inside is soft. It is very delicious~~~
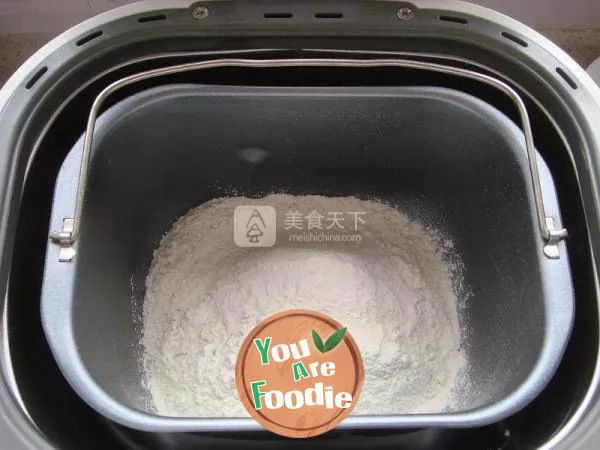
Step 1 . Pour the flour into the bread bucket. (bread maker and noodles liberate hands and save time and effort.)
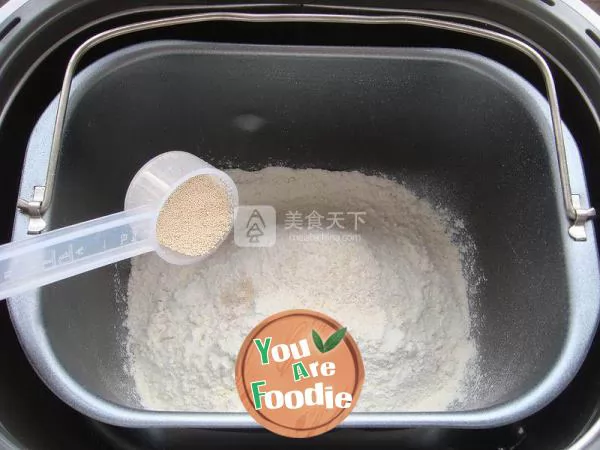
Step 2 . Add yeast powder.

Step 3 . Pour in clean water. (each flour has different water absorption, please add less for many times according to the dough state)

Step 4 . Select menu: dough ---- steamed stuffed bun dough (default 90 minutes) --- start button.

Step 5 . Rolling dough. (mix noodles for half an hour, followed by fermentation time, this gap to prepare stuffing)
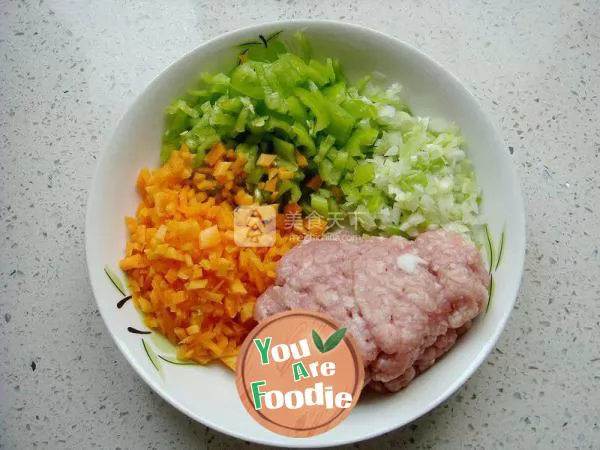
Step 6 . Dice streaky pork with minced pork foam, green onions, green peppers and carrots respectively.

Step 7 . Put the bottom oil into the frying pan, pour in the scallions and stir fry.
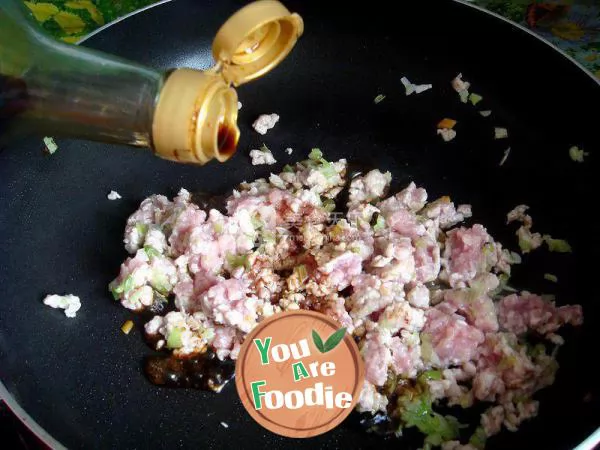
Step 8 . Pour in the minced meat and stir fry for a few times. Add cooking wine, soy sauce and stir fry evenly.

Step 9 . Pour in carrots and stir fry.
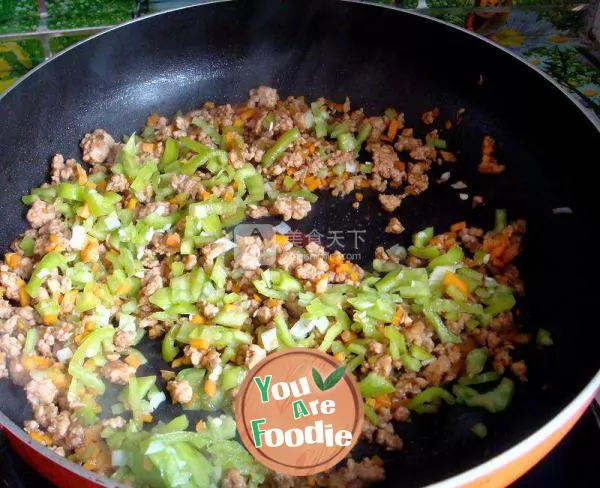
Step 10 . Finally, pour in green peppers.

Step 11 . Add salt, stir fry until it is seven to eight mature, turn off the heat and set aside.
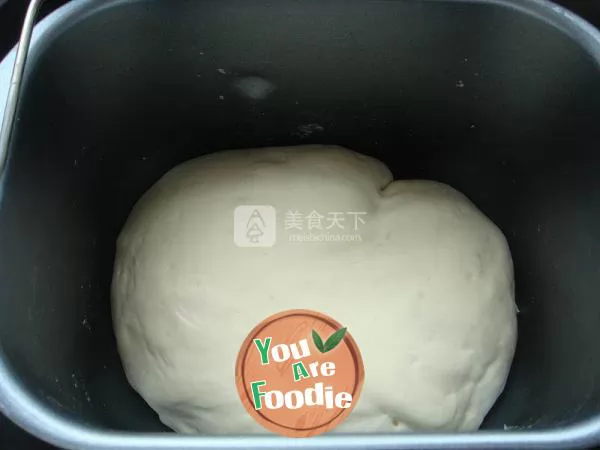
Step 12 . Take out the fermented dough.

Step 13 . Put it on the cutting board and knead it for a few times to exhaust.

Step 14 . Divide into two dough of the same size.

Step 15 . Roll the dough into rectangular slices.

Step 16 . Brush with soy sauce. (or sweet flour sauce, chili sauce and the like can also be used according to personal preferences)

Step 17 . Spread a layer of fried stuffing.
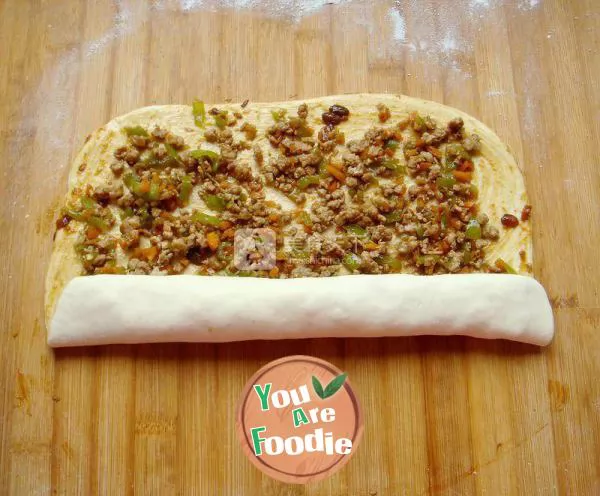
Step 18 . Roll up from one end.
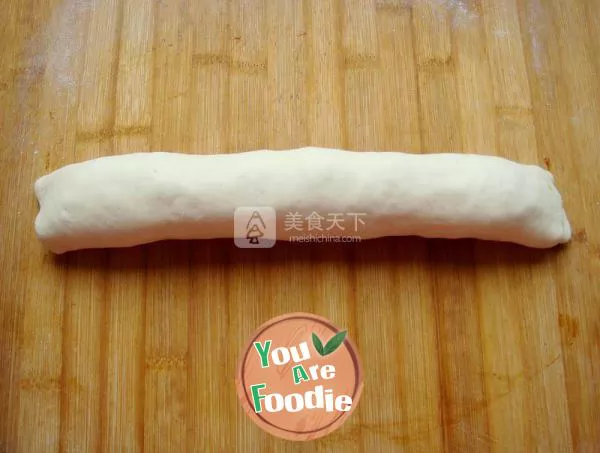
Step 19 . After being rolled up, put it down.
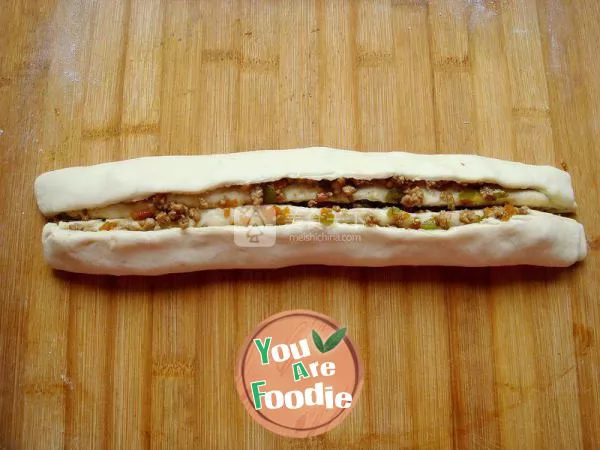
Step 20 . Cut it in the middle with a knife and divide it into two.
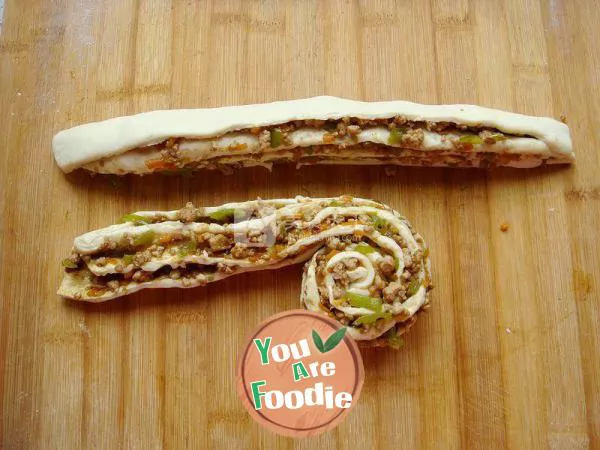
Step 21 . Roll up the cut from one end.
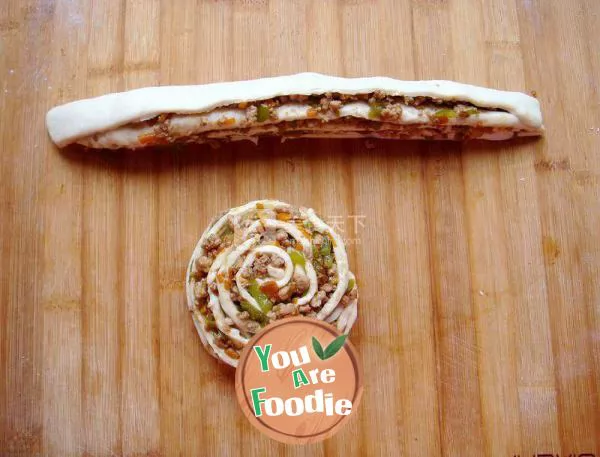
Step 22 . After rolling, put the end under the cake germ.

Step 23 . Put it into the baking tray with tin foil or tarpaulin paved, and gently press it down a few times to make the cake thinner. (because it will rise higher during the baking process, so it is easier to cook and the vegetables won't fall out.)

Step 24 . Brush a layer of edible oil on the surface of the cake embryo, preheat the oven up and down 220 degrees, put it in the middle layer, and bake for 25 minutes. The surface is golden yellow.

Step 25 . Finished product, crisp and delicious~~~

Step 26 . Finished product drawing, simple practice~~~

Step 27 . Easy to obtain materials~~~

Step 28 . Scorched outside and tender inside~~~
* Information is provided from the Internet, If there is a copyright infringement, Please contact administratoryouarefoodie.com, We will deal with as soon as possible, Thank you!